Post by Matt on Jun 5, 2006 8:46:58 GMT -5
The “Canon” hood
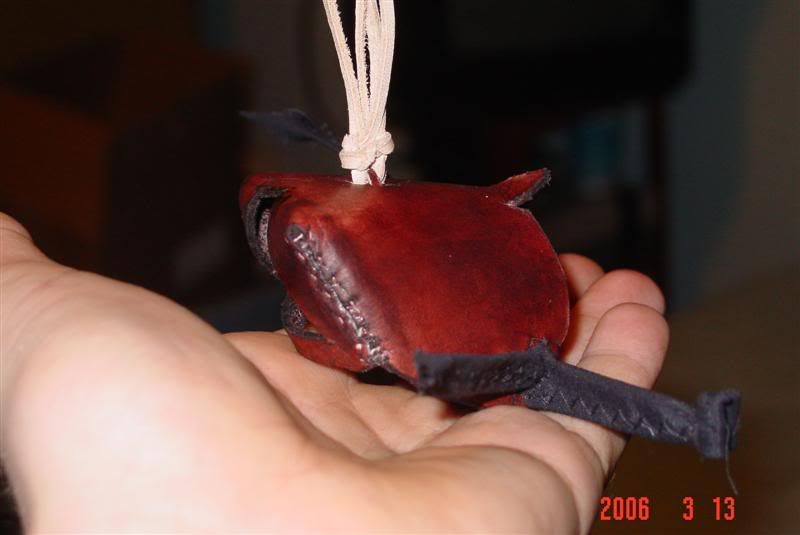
Preparation:
Instructions for a 45 MM hood… Scale to your other size.
First off, I make my hoods using 2-3 Oz cowhide leather.
I make the “canon” hood. It’s a very good type of hood in my opinion and will fit falcons, hawks and should fit eagles. The pattern creator I use is H.J. Slijper’s Canon style hood pattern creator. Just in put the size in MM (to find out your birds size, measure from corner eye to corner eye).
I cut the pattern out of the piece of paper and then take masking tape and tape it flat to the piece of leather. I cover the whole pattern in ONE layer of masking tape, you should still be able to see all the sides of the pattern so that you can properly cut it out without ruining a good piece of leather!!
I use and X-acto knife and cut around the pattern on the lines. I don’t totally cut through the leather. After I cut all around I peel off the pattern and I should have an outline of the hood in masking tape, and a nice cut all the way around that doesn’t go through the leather.
I now switch to a stronger bladed tool, that’s sharper and easier to control. I use a rectangular razor blade; mind has the handle so it’s very easy to control. I now fully cut out the pattern from the leather, careful not to mis-cut and screw up the hood!!
To make the brace slits I cut about 2 MM from the edge on both surrounding edges of the back. I make the slits about 1 CM in length and about 1.5 MM away from each other. To make the “Knot Slits” I cut the first one about a CM and 2 MM away from the top of the beak opening. I make them about 1 CM in length and about 1.5-2 MM apart from each other.
***NOTE***
In my own way I don’t cut the slits while the pattern is flat. I cut it later on…
Sewing:
For thread I use dental floss, I get off a piece about 18 inches long, take a match and burn the end so that it melts into a knot… this might take a few tries, now when you pull the hood tight, that knot will get caught!
After the hood is cut out. The edges I am going to sew, I take a wet finger and make the edges wet.
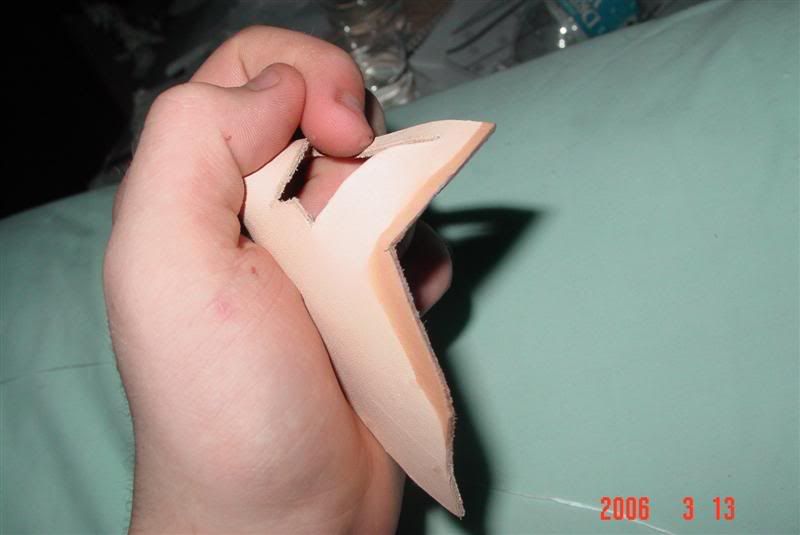
If you wish you can use a stitch marker, but I prefer not to use one. For the first stitch I start at the top of the hood, (where the V like bend is) and push the needle UP through the leather edge at a 45 degree angle so it comes out the top about 1-2MM from the edge of the leather.
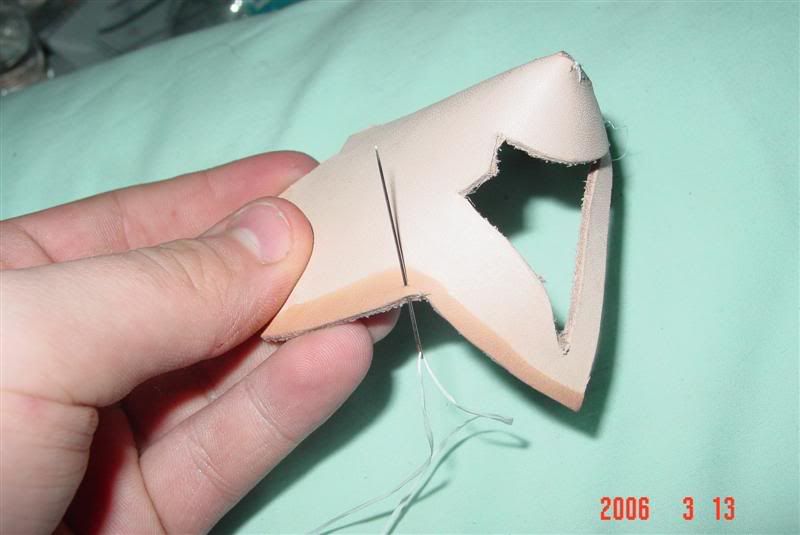
After the first stitch upward, you want to hold the hood with the edges your sewing at the top. I always start on the right of the edge, when I push up I move the needle about a MM to the right and push down 45 Degrees about 1-2 MM away from the edge.
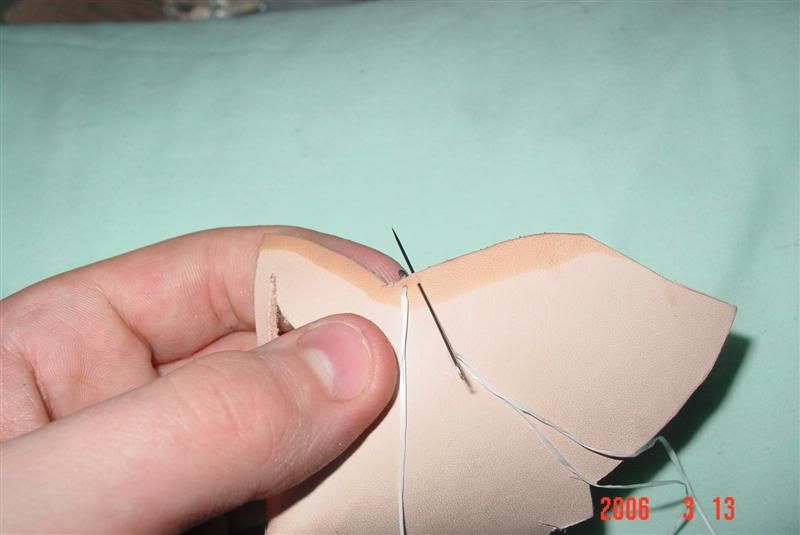
You should now have the needle coming out of the edge of the leather, go to the left top of the hood and push the needle UP in a 45 degree angle.
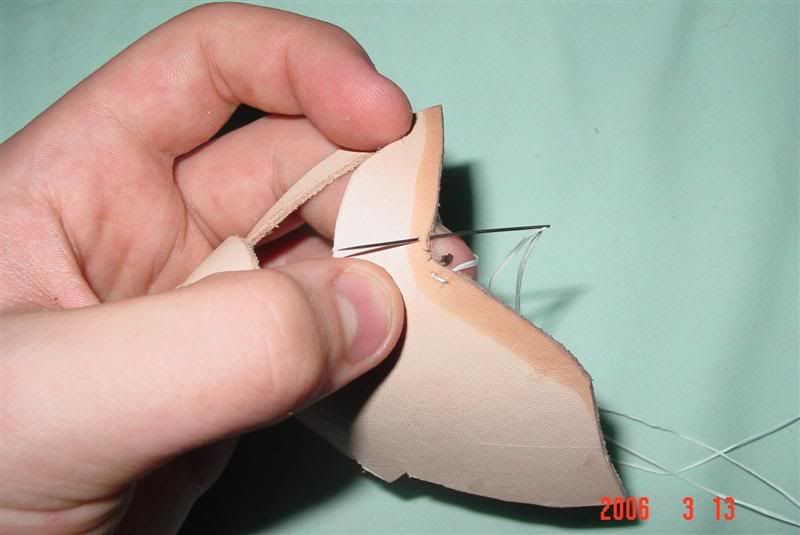
The sewing should basically go like this: Down-up-over-down-up-over… etc.
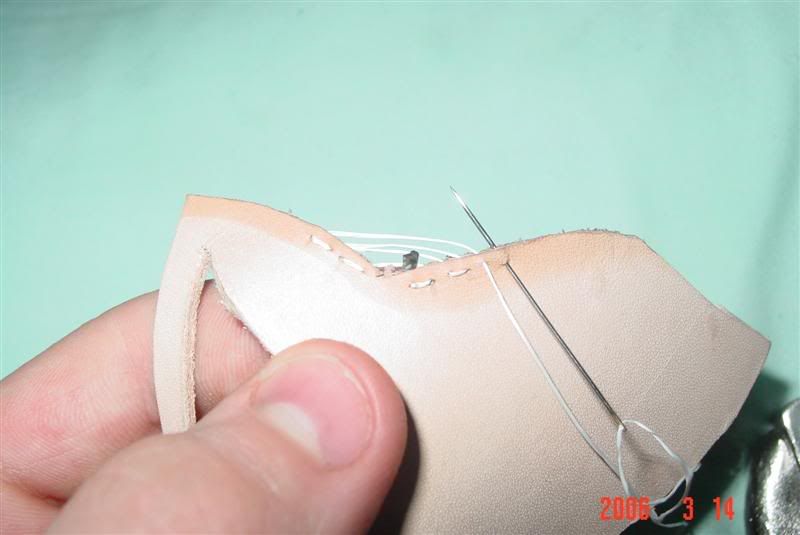
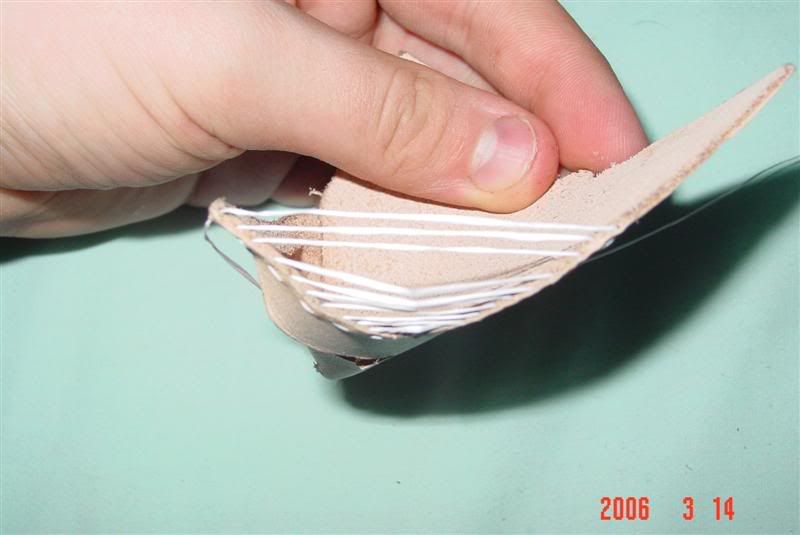
I go down the whole edges of the leather WITHOUT tightening it. Now here is when you either fail, or succeed. SLOWLY pull the thread to tighten it. When they are closed, pull it TIGHT, DO NOT YANK THE THREAD!
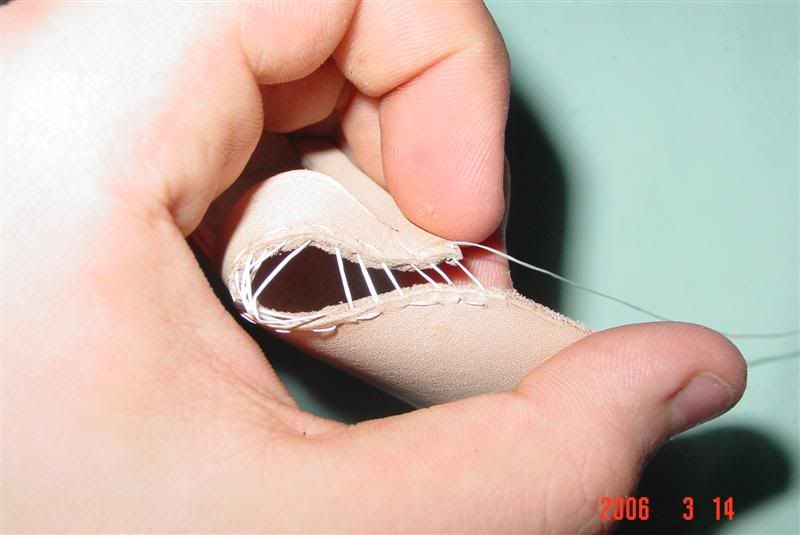
Now pull the needle over and stick it in the other edge of the leather, pull it through, and then tighten it a bit more. After tightening it, I move the needle and push it down through the seem, pull it over, make a loop, tie it, do it again. After it’s tied I take a match and burn/melt the knot. This seals the knot.
Repeat for opposite side!
There you have it! Sewing the hood!
***NOTE*** I have had some problems with one side of the Canon hood on the beak opening being larger/smaller then another side…This occurs even when it is cut PERFECTLY. I just shave it off until it looks about the same. To make sure that the cere doesn’t get irritated, shave off some of the beak opening at a 45 degree angle.
Making Gortex Braces:
Cut off 2 strips, 12 inches long, 1 inch wide.
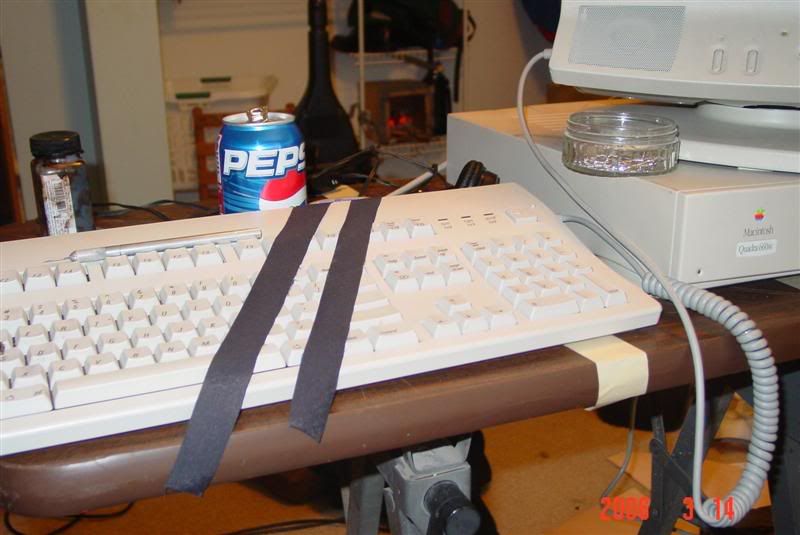
Fold in one quarter of the 1 inch width part. Fold the other quarter over it. You should end up with a piece that is about 3/4s a CM in width.
Pin it!
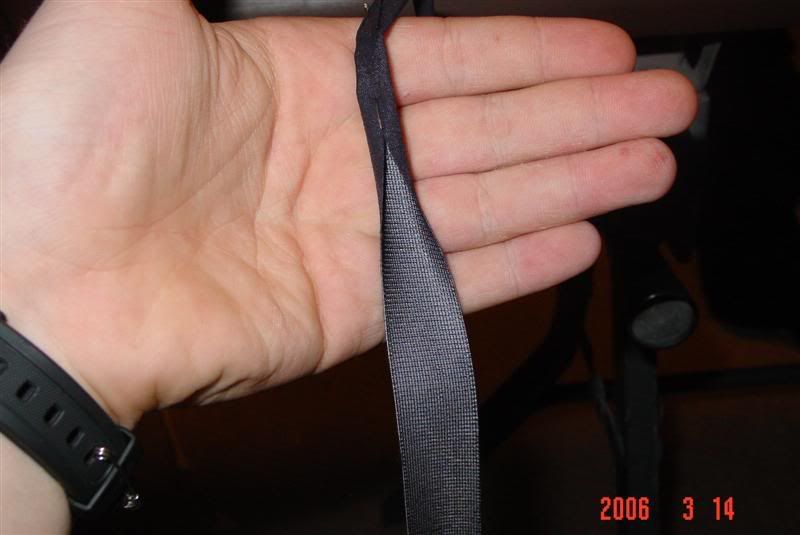
Continue to fold and pin all the way down the piece of Gortex; so that all of it is about 3/4s a CM in width.
Take it a sewing machine, and sew it using a diagonal stitch. WATCH YOUR FINGERS!!! Sew all the length down it, then fold over 1 CM on either side… doesn’t matter which, and punch a hole in the dead center of it.
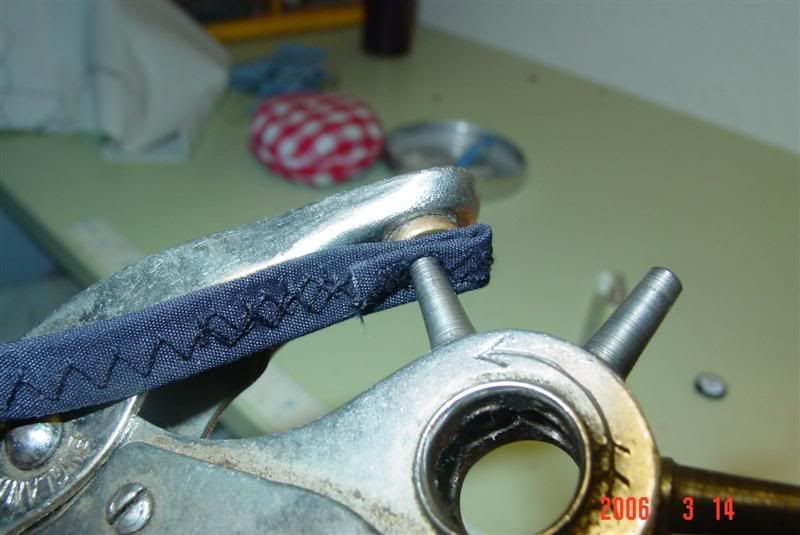
Cut the other side into a V or a \| shape. Put that through the hole making basically a 12 inch jess out of Gortex!
Repeat for second one!
Now cut 2 inches down from the knot at the top on both braces!
Braces complete!
Next step… installing!
Installing Braces:
Take this as the rear of the hood
| | | \ edge of leather is here (if facing left side of hood)
123
Alright! Here we go! This | | | are the slits, labeled 1, 2, and 3.
Take the brace and push it down through slit 2, pull down to right where it hits the slit you made on the brace. (Remember we are doing this on the LEFT side of the hood)
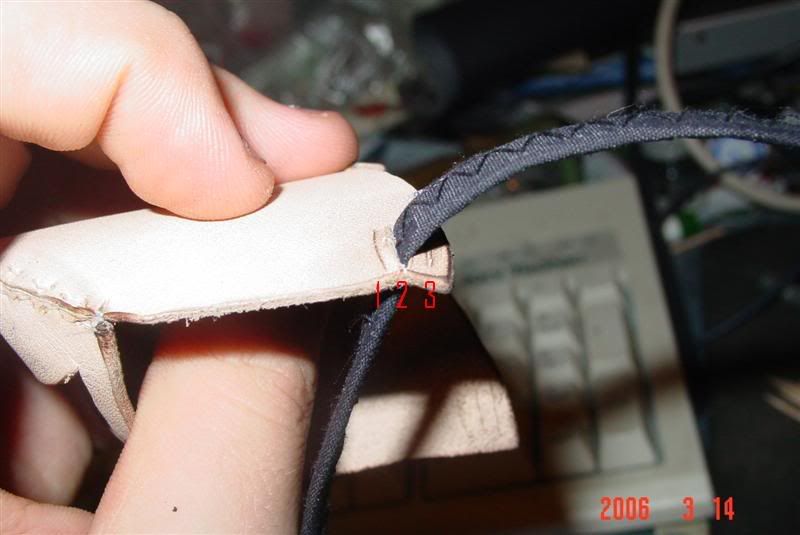
(The 2 inches from the knot one). Now, take it and push it up through slit 1.
Now, take it and push it through the slit in the brace,
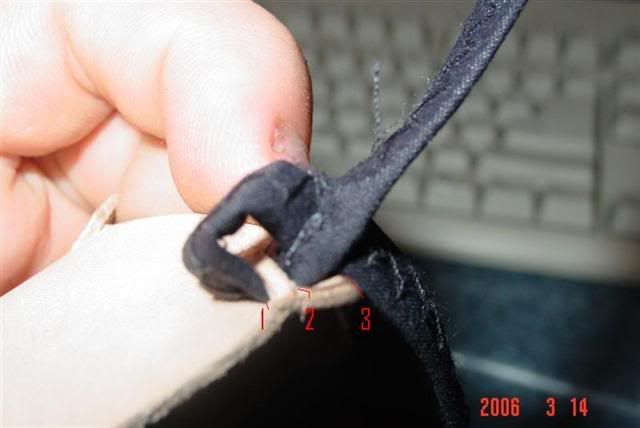
take that tip and push it back down into 2, pull it through, snug it up! Now take the tip again, move it up 3, pull through.
Repeat for second brace.
Take the brace on the left, and cut a slit 3/4 CM long about a MM from where it exits slit 3.
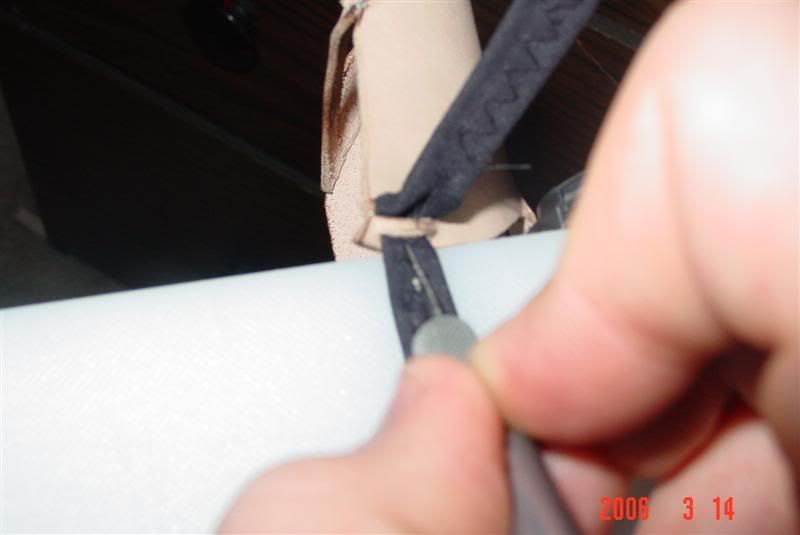
Ok, we are going to label the brace on the left, B and the brace on the right A.
Take A, and put it up through that slit we just made in B,
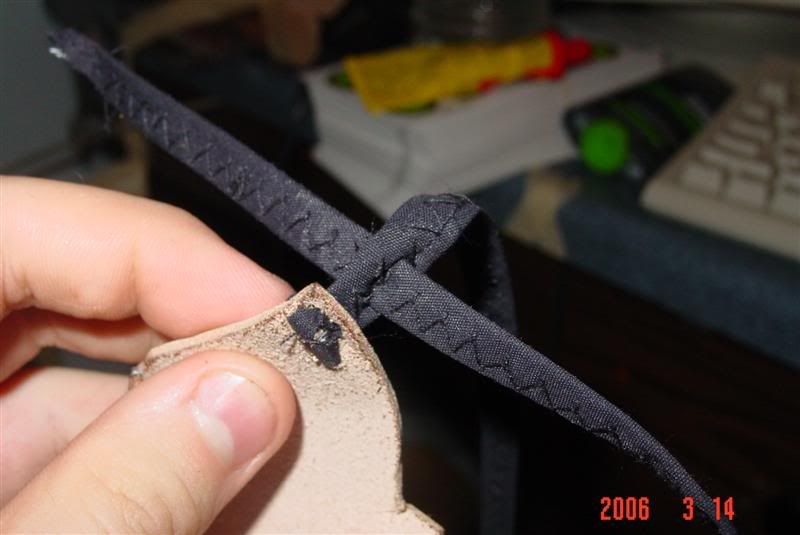
pull it up, and then take it and push it through under the piece of leather between slits 2 and 3 on the left, take the tip and continue to push forward and through the slit in brace B. (The one that is 2 inches below the knot!).
Because brace B ended up on top of brace A (if it didn’t you messed up), just take it and push it under slit 2 and 3 on the right side of the hood and continue through the slit in brace A.
All done correctly it should open and close in the pictures shown!
Open:
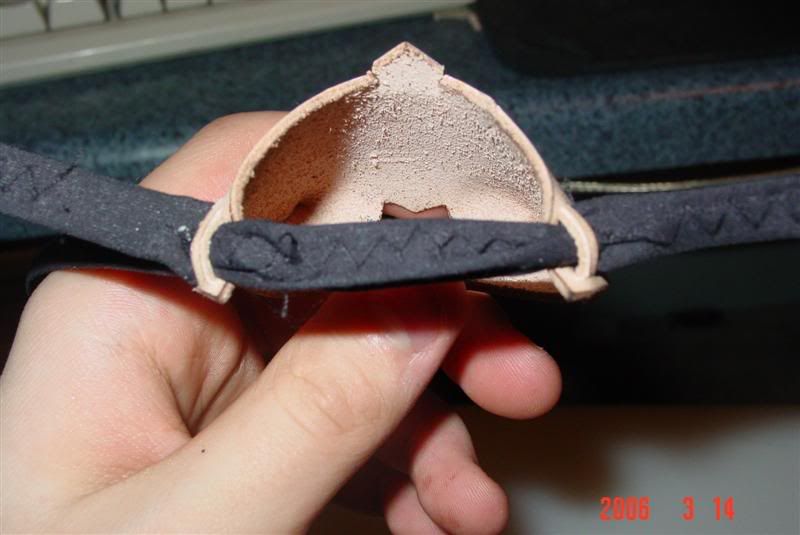
Closed:
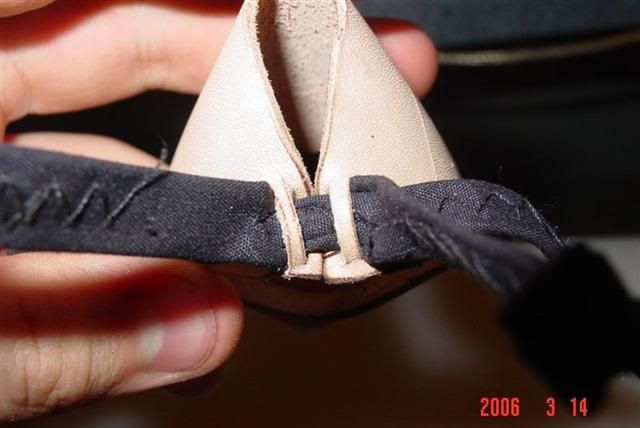
Thought you all might like this!
Matt

Preparation:
Instructions for a 45 MM hood… Scale to your other size.
First off, I make my hoods using 2-3 Oz cowhide leather.
I make the “canon” hood. It’s a very good type of hood in my opinion and will fit falcons, hawks and should fit eagles. The pattern creator I use is H.J. Slijper’s Canon style hood pattern creator. Just in put the size in MM (to find out your birds size, measure from corner eye to corner eye).
I cut the pattern out of the piece of paper and then take masking tape and tape it flat to the piece of leather. I cover the whole pattern in ONE layer of masking tape, you should still be able to see all the sides of the pattern so that you can properly cut it out without ruining a good piece of leather!!
I use and X-acto knife and cut around the pattern on the lines. I don’t totally cut through the leather. After I cut all around I peel off the pattern and I should have an outline of the hood in masking tape, and a nice cut all the way around that doesn’t go through the leather.
I now switch to a stronger bladed tool, that’s sharper and easier to control. I use a rectangular razor blade; mind has the handle so it’s very easy to control. I now fully cut out the pattern from the leather, careful not to mis-cut and screw up the hood!!
To make the brace slits I cut about 2 MM from the edge on both surrounding edges of the back. I make the slits about 1 CM in length and about 1.5 MM away from each other. To make the “Knot Slits” I cut the first one about a CM and 2 MM away from the top of the beak opening. I make them about 1 CM in length and about 1.5-2 MM apart from each other.
***NOTE***
In my own way I don’t cut the slits while the pattern is flat. I cut it later on…
Sewing:
For thread I use dental floss, I get off a piece about 18 inches long, take a match and burn the end so that it melts into a knot… this might take a few tries, now when you pull the hood tight, that knot will get caught!
After the hood is cut out. The edges I am going to sew, I take a wet finger and make the edges wet.

If you wish you can use a stitch marker, but I prefer not to use one. For the first stitch I start at the top of the hood, (where the V like bend is) and push the needle UP through the leather edge at a 45 degree angle so it comes out the top about 1-2MM from the edge of the leather.

After the first stitch upward, you want to hold the hood with the edges your sewing at the top. I always start on the right of the edge, when I push up I move the needle about a MM to the right and push down 45 Degrees about 1-2 MM away from the edge.

You should now have the needle coming out of the edge of the leather, go to the left top of the hood and push the needle UP in a 45 degree angle.

The sewing should basically go like this: Down-up-over-down-up-over… etc.


I go down the whole edges of the leather WITHOUT tightening it. Now here is when you either fail, or succeed. SLOWLY pull the thread to tighten it. When they are closed, pull it TIGHT, DO NOT YANK THE THREAD!

Now pull the needle over and stick it in the other edge of the leather, pull it through, and then tighten it a bit more. After tightening it, I move the needle and push it down through the seem, pull it over, make a loop, tie it, do it again. After it’s tied I take a match and burn/melt the knot. This seals the knot.
Repeat for opposite side!
There you have it! Sewing the hood!
***NOTE*** I have had some problems with one side of the Canon hood on the beak opening being larger/smaller then another side…This occurs even when it is cut PERFECTLY. I just shave it off until it looks about the same. To make sure that the cere doesn’t get irritated, shave off some of the beak opening at a 45 degree angle.
Making Gortex Braces:
Cut off 2 strips, 12 inches long, 1 inch wide.

Fold in one quarter of the 1 inch width part. Fold the other quarter over it. You should end up with a piece that is about 3/4s a CM in width.
Pin it!

Continue to fold and pin all the way down the piece of Gortex; so that all of it is about 3/4s a CM in width.
Take it a sewing machine, and sew it using a diagonal stitch. WATCH YOUR FINGERS!!! Sew all the length down it, then fold over 1 CM on either side… doesn’t matter which, and punch a hole in the dead center of it.

Cut the other side into a V or a \| shape. Put that through the hole making basically a 12 inch jess out of Gortex!
Repeat for second one!
Now cut 2 inches down from the knot at the top on both braces!
Braces complete!
Next step… installing!
Installing Braces:
Take this as the rear of the hood
| | | \ edge of leather is here (if facing left side of hood)
123
Alright! Here we go! This | | | are the slits, labeled 1, 2, and 3.
Take the brace and push it down through slit 2, pull down to right where it hits the slit you made on the brace. (Remember we are doing this on the LEFT side of the hood)

(The 2 inches from the knot one). Now, take it and push it up through slit 1.
Now, take it and push it through the slit in the brace,

take that tip and push it back down into 2, pull it through, snug it up! Now take the tip again, move it up 3, pull through.
Repeat for second brace.
Take the brace on the left, and cut a slit 3/4 CM long about a MM from where it exits slit 3.

Ok, we are going to label the brace on the left, B and the brace on the right A.
Take A, and put it up through that slit we just made in B,

pull it up, and then take it and push it through under the piece of leather between slits 2 and 3 on the left, take the tip and continue to push forward and through the slit in brace B. (The one that is 2 inches below the knot!).
Because brace B ended up on top of brace A (if it didn’t you messed up), just take it and push it under slit 2 and 3 on the right side of the hood and continue through the slit in brace A.
All done correctly it should open and close in the pictures shown!
Open:

Closed:

Thought you all might like this!
Matt
